
How to make our Mia Thong
- maevehuthwaite
- Aug 1, 2023
- 2 min read
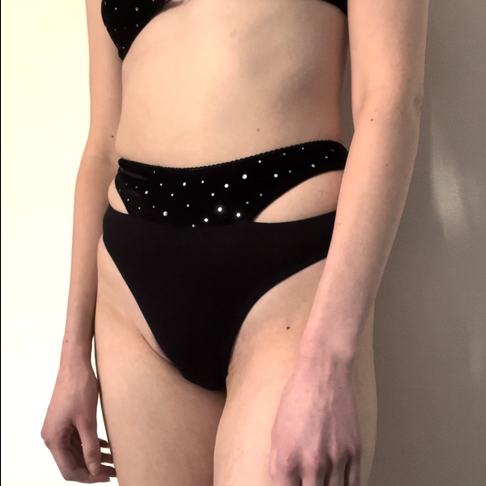
Our Mia thong is a cute layered style with hip cut outs. The construction of this design is relatively simple once you master attaching lingerie elastic and bagging out a gusset. I love making the Mia and styling it under low cut jeans for a fun, 90's inspired look, but it's also a great pattern if you just want to elevate your everyday thongs slightly.
Level: Intermediate
What You Need
Stretch fabric e.g. jersey
Cotton jersey for gusset lining
4-10mm plush back elastic
Sewing pins or clips
Iron
Scissors or a rotary cutter
Ruler or tape measure
A4 paper
Printer
Cut out the pattern pieces
Lay your pattern pieces of the fabric. The arrows should align with the direction that has the most stretch. Carefully cut around the pattern pieces, ideally using a rotary blade for increased accuracy.
Sew the side seams
At the side seams, place right sides of the fabric together and stitch using an overlock stitch or a zigzag. You could also use a straight stitch, but this will limit the amount of vertical stretch the garment will have.
Repeat this step to join the all four side seams.
Bag out the gusset
The gusset on this pattern is bagged out meaning the seam edges are hidden between the gusset layers.
Start by placing the back edge of the gusset outer to the front gusset seam with right sides together, pin in place.
Then place place the right side of the gusset lining to the wrong side of the front gusset seam and pin. Sew this seam with an overlock or straight stitch.
Next flip the gusset over and place the front edge of the gusset outer to the front gusset edge and pin in place.
Then place the right side of the gusset lining to the wrong side of the front gusset seam and pin in place. This should look like there is a single twist in the gusset outer and lining, but this is necessary as when finished it will be straightened out and the seams trapped in between the layers. Sew the seam with preferred stitch.
Attach the elastic to the opening edges
Attach the elastic using the two-step zigzag technique. You can visit our post on elastic here for more in depth instructions.
If you prefer elastic binding, remove the 0.6cm seam allowance before attaching.
Attach the lower waist seam
Matching the all notches, join the upper panel to the lower panel with right sides together. Be careful to take the correct seam allowance (6mm) as this will be needed in the next step.
Attach the elastic to the lower waist edge
Attach the elastic to the lower waist edge using the two-step zigzag technique. In the first step, attach the elastic to the seam allowance from the previous step. Then, when you turn the elastic to the inside, the elastic should be stitched down onto the lower panel. Pull the top and bottom panels apart to get a nice smooth finish.
Attach the elastic to the remaining edges
Attach the elastic to the remaining leg and waist edges using the two-step zigzag technique.


*This post may contain affiliate links, which means I may receive a small commission, at no cost to you, if you make a purchase through a link*


Comments